 |
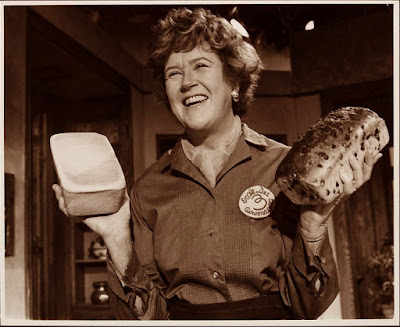
“How can a nation be called great if its bread tastes like Kleenex?”
Julia Child on factory made white bread
|
Egg and animal fat were once the forbidden foods, but after several studies they got the green light again. More recently, the new villains became gluten (a combination of two proteins found in wheat and other grains) and lactose (a type of sugar found in milk and dairy products). Studies have shown that these components can indeed cause inflammation in people with digestive disorder and autoimmune diseases, coeliacs, and people with behavioural conditions such as autism and ADD (Attention Deficit Disorder). But for the great majority, gluten and lactose derived from mostly organic ingredients, in a balanced diet, are harmless. I would recommend you to avoid the commercial white loaf, or those wholemeal breads that contain lots of additives and preservatives, and make your own. Otherwise, just find a good artisan bakery near you.
Last week I mentioned that a good way to enjoy my Greek salad was
having it with a piece of sourdough bread. Learning to make it can be fun. To
be honest, it can also be hair pulling, but the result is very satisfying.
Although sourdough bread has been around for several thousands of
years, it became increasingly popular in the last decade. Michael Pollan has made
it a little more fashionable with his brilliant Cooked series. I tried
baking my own several times and never quite succeeded. But I was determined,
and was encouraged by my friends - the amazing food writer/developer and nutritionist
Neide Rigo, who makes the most delicious looking sourdough bread and writes my favourite blog in Brazil, come-se;
and Brian, an amazing cook. Their tips and some research on my part kept me
going.
I had some major failures but a mixture of Ken Forkish’s and Chad
Robertson's methods finally gave me a lovely and exhilarating result. The whole
family gathered around the loaf and cheered their first slice of still warm
crunchy-crusted homemade sourdough bread. You can watch Ken’s videos here.
Or a masterclass with Chad Robertson here, to understand the steps better.
After my baptism of fire, I decided to attend the brilliant Culinary Anthropologist, Anna
Colquhoun’s hands-on bread course. With her, I
learnt some important tips and techniques that have since given me confidence
to bake more often. I encourage you to have a go at baking your sourdough loaf.
Making bread is a work of love, persistence and
patience. It’s also very therapeutic.
 |
| Starter - day 1 |
 |
| Starter - day 5 |
How to make Sourdough Bread (Chad Robertson recipe, adapted by Anna
Colquhoun)
The recipe is very long
and the process too. Don’t be put off. Once you have a
good starter you are very likely to obtain a good result.
First: How to make the starter
Ingredients for the starter
Organic rye flour or *organic wholewheat
Filtered or spring water
Day 1: Make the Initial Starter
100ml filtered/spring
water
50g organic rye flour
Stir vigorously until
combined into a smooth batter. Scrape down the sides and loosely cover the
container with plastic wrap or a clean shower cap. Place the container
somewhere warm and let it sit for 24 hours.
Day 2: Feed the starter
75ml filtered/spring
water
50g organic rye flour
Add the above
ingredients to Day 1’s mixture and stir vigorously. Let it sit for 24 hours.
Day 3: Feed the starter
50ml filtered/spring
water
50g organic rye flour
Repeat the instruction
above.
Days 4, 5, 6: repeat
the instruction as above. By day 5-6 your starter should be very active with
lots of bubbles, smell yeasty and pleasantly sour. It should also have doubled
its volume.
*If you are making it with wholewheat flour:
Day 1: 75ml filtered or spring water and 50g organic wholewheat flour
Day 2: yesterday's mix, 50ml filtered or spring water and 50g organic wholewheat flour
Day 3: yesterday's mix, 50ml filtered or spring water and 50g organic wholewheat flour
Days 4, 5, 6: repeat the instructions above.
How to maintain the starter
Once your starter is
ready, you can maintain it by feeding it once a week, if it lives in the
fridge; or every other day, if you keep it on the counter.
50-100g of starter
(discard the rest or use it to make pancakes)
200ml filtered or spring
water
200g flour (wholewheat,
rye or a 50:50 mix of rye/wholewheat and strong white flour)
 |
|
Mixing the levain with dough ingredients
|
 |
| Add the flours and mix
until no dry patches appear |
 |
| Now sprinkle the salt and remaining 50ml water |
 |
|
Doughs resting overnight in a proofing basket and a bowl
|
 |
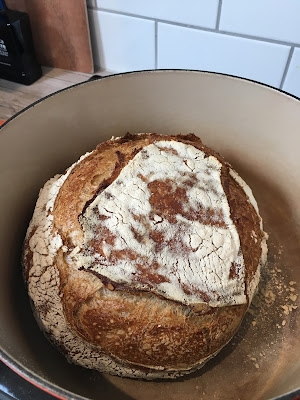
| Baked inside a heavy pot |
 |
|
Second loaf, looking good too
|
 |
|
Still warm and ready to be devoured
|
Second: How to make the Bread
Makes 2 loaves
Ingredients
For the levain:
1-2 tablespoons active sourdough starter
200ml water
100g wholewheat flour
100g white bread flour
100g white bread flour
Around 8-10 hours before you want to
make bread, prepare the levain by mixing the ingredients thoroughly in a
plastic tub. Leave at room temperature overnight, no more than 12 hours. It
should rise and bubble.
If the levain is very
bubbly, it's ready to be used. If you want to make sure the mixture is ready to
use, drop a teaspoon of it into a glass of lukewarm water. It should float. If
it doesn’t, repeat the process again.
For the dough:
200g levain, ready to
go
675ml + 50ml warm water
800g white bread flour
200g wholewheat, spelt, malted or rye
flour
22g salt
extra flour for dusting
Mix 200g of levain with 675ml warm
water. Add the flours and mix until no dry patches appear. Cover with a shower
cap or cloth and rest for 20 minutes. Sprinkle the salt and remaining 50ml
water. Now is when you can add seeds, nuts, dried fruits, herbs, olives and
etc, if you wish. Mix with your hands until the dough feels hydrated. Use
a scraper to clean down the sides of the bowl. Cover.
Let the dough rise at room temperature
for 3-4 hours.
Every half hour, give it a series of turns
(what the bakers call “folds”). Grab the dough at the top edge, lift it up,
stretch and fold it to the centre, repeat all the way around the dough, moving
clockwise. Let the dough rest 30 minutes. Repeat this process a total of 6
times, every half hour for a total of 2 1/2 hours. The dough will gradually
become smoother and stronger.
Once you've finished the folds, let the
dough rise undisturbed for 30 to 60 minutes, until it looks slightly puffed.
This dough won't double in size the way regular, non-sourdough breads will; it
should just look larger than it did when you started.
Sprinkle some flour over your counter
and turn the dough out on top. Use a pastry scraper to divide the dough in half
and to shape each one into loose rounds. Shape it round (or boule) by making
a series of folds, using a little flour as above to create a smooth surface.
Let it rest for 20 minutes.
In the meantime, line 2 bread proofing
baskets, colanders, or mixing bowls with clean dishtowels. Dust them heavily
with flour, rubbing the flour into the cloth on the bottom and up the sides
with your fingers.
Flip over the boules and shape again.
Transfer them to the baskets, seam-side up. If the seams are gaping pinch them
closed. Cover with shower caps or damp towels. Let them rise at room
temperature for 3 to 4 hours. Alternatively, place the covered basket in the
refrigerator and let them rise slowly overnight, 10-20 hours. If rising
overnight, bake the loaves straight from the fridge.
Half an hour before you are ready to
bake the bread, preheat the oven to 250C degrees and place a Dutch oven or a
heavy ovenproof pot with a tight fitting lid inside. If you don’t have two pots
bake one loaf after the other (leaving the second one in the fridge).
Carefully remove the Dutch oven from
the oven, close the oven door and remove the lid. Flour the top of the dough
and carefully tip the loaf into the pot so the seam-side is down.
Carefully and confidently use a sharp
knife, or serrated knife to quickly score the surface of the loaves. Be careful
not to burn yourself on the hot pot.
Cover the pots and place them in the
oven to bake for 20 minutes. Reduce the temperature to 240C degrees. After 20
minutes, remove the lid, turn the heat down to 230C degrees and continue baking
for a further 25 minutes until the crust is golden brown **. Remove from the
pot and let it cool on a rack.
**P.S: to obtain a very good crust, I
place a bowl or a small baking tray of hot water in the oven while the bread
bakes. Another option is to fill a clean spray bottle with water when I take
the lid off and spray the bread and oven.
A healthy note: Due to the
long process of fermentation, phytic acid (an enzyme
inhibitor) is neutralized and makes the bread easier for us to digest.
According to a recent research
project in Canada, there is new evidence to support sourdough’s superior effect
on blood glucose levels, compared to wholewheat bread. Sourdough bread contains
nutrients such as B vitamins (including thiamin, niacin, folate and B12), iron,
zinc, magnesium, potassium and antioxidants.


Hi Margot,
ReplyDeleteGreat blog, very thoughtful and thorough. As you know I am '"old school" and use the traditional oven instead of the "Dutch oven " method . I was very flattered that you mentioned me however looking at your results I might be converting to the "Margot method " of sour dough creation.
I totally agree that baking sourdough is a very therapeutic process and I do look forward to my one baking day a week when that glorious smell of bread baking permeates throughout the house .
I normally bake 3 medium sized loaves a week and what I don't use on the day I cut in half , clingfilm and freeze , so I always have a supply when needed.
You old pal
Brian x
Dearest Brian, thank you so much, my friend! I am the one who feel flattered with your feedback. You are definitely one of the people that I look up to when it comes to good food. I am so happy you like the blog and the post. Please , let me know how you get on with this method, I am sure you will master the technique with ease. Lots of love, xx
ReplyDelete